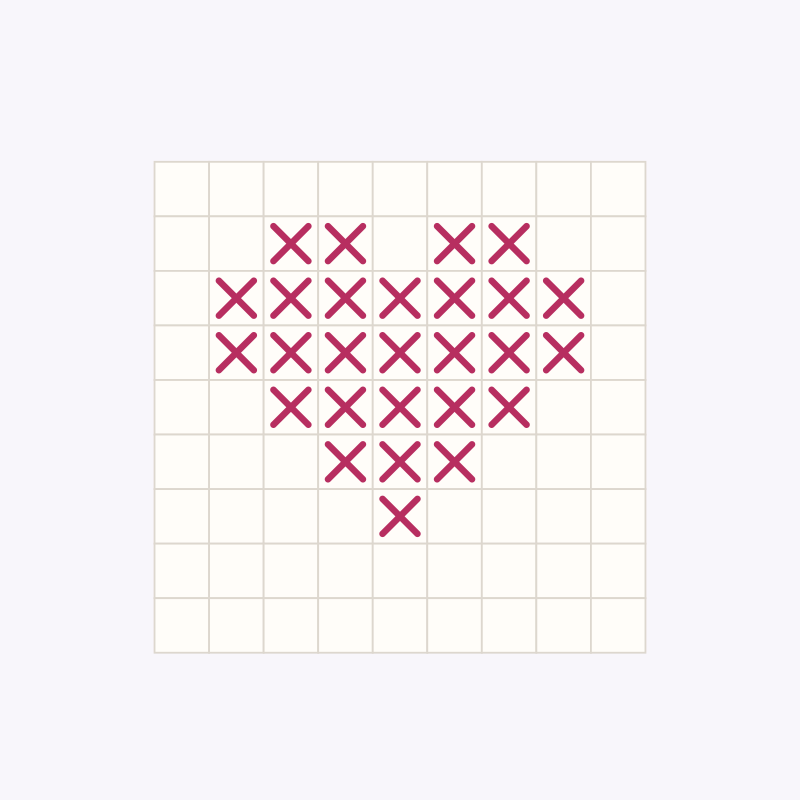
Pattern diagramAbout this image
Diagram drawn from this project’s written instructions. Use the instructions for measurements and construction. This is not a finished-project photograph.Cross-stitch
A tiny stitched heart
A little heart made of full crosses. Stitch one on a gift tag or repeat it as a border.
Before you begin
Materials
- 10 × 10 cm (4 × 4 in) 14-count Aida cloth
- Red or pink stranded embroidery floss
- Size 24 tapestry needle
- Small hoop, scissors, pencil and paper for chart
Quick reference
Abbreviations
- X
- One full cross-stitch over one Aida square.
- .
- Leave this square unstitched.
One step at a time
Step-by-step instructions
- 1
Copy the nine-square chart
Read these rows from top to bottom. Each row is nine squares wide. X means stitch and a dot means blank.
.........
..XX.XX..
.XXXXXXX.
.XXXXXXX.
..XXXXX..
...XXX...
....X....
.........
.........
- 2
Find the center
Fold the fabric gently in half in each direction and unfold. The crossing marks the center. The chart center is row five, column five. Count from that point to your first stitched square.
- 3
Start with a loop
Cut one 80 cm (32 in) strand from the floss and fold it in half. Thread both cut ends through the needle. Bring the needle up, leaving the folded loop on the back. Make the first diagonal, then pass the needle through the loop on the back to secure it.
- 4
Work full crosses
Bring the needle up at a square’s lower-left hole and down at its upper-right. Then come up at lower-right and down at upper-left. Use the same top diagonal throughout. Follow the X squares in the chart; leave all dots blank.
- 5
Check the shape
The two lobes begin on row two. Rows three and four each have seven crosses, then the heart tapers to five, three, and one. Check the chart after every row.
- 6
Finish the thread
Run the needle under four or five stitches on the back and trim. Remove the hoop. If washing, check thread colorfastness first; dry flat and press face down on a towel.
Original starter instructions. Sizes and making times are approximate; check your tension and measurements as you go.
Maker notes
Your shelf
Sign in to save projects across devices and share your making.
Finished projects
No makers have shared a finished version yet.
Questions and notes
No comments yet. You can be the first to share a useful note.